

Creating a suitable and comfortable enclosure for your sulcata tortoise is an exciting project that will provide a safe and enriching environment for your reptile companion. Building your own tortoise enclosure allows you to customize the size, features, and design to meet the specific needs of these amazing animals. Whether you are a seasoned DIY enthusiast or new to construction projects, this step-by-step guide will help you create a fantastic habitat for your sulcata tortoise.
When planning your DIY tortoise enclosure, consider the size of your sulcata tortoise. These reptiles can grow to be quite large, reaching lengths of up to 30 inches and weighing over 100 pounds. As a rule of thumb, provide at least 10 square feet of indoor space per tortoise, with additional outdoor space when weather permits. This will ensure your tortoise has enough room to move around and explore.
In addition to space, your enclosure should include a variety of features to promote your tortoise’s physical and mental well-being. This could include rocks and logs for climbing and basking, hiding spots for security, and shallow water areas for soaking. Offering a diverse environment will keep your tortoise engaged and stimulated, enhancing its overall quality of life.
Why Build a Diy Sulcata Tortoise Enclosure?
Constructing a DIY Sulcata tortoise enclosure provides numerous benefits for both you and your pet. Creating a suitable living environment is essential for the health and well-being of these amazing reptiles. By building your own habitat, you have the opportunity to customize the enclosure to meet the specific needs of your Sulcata tortoise.
Firstly, building an enclosure allows you to control the size, shape, and layout of the habitat. This is important because Sulcata tortoises require a large space to roam and explore. In the wild, they are used to vast open areas, so providing a spacious habitat is crucial for their physical and mental health.
DIY enclosures also give you the freedom to select the appropriate materials for the construction. You can choose non-toxic and environmentally-friendly materials that ensure the safety of your pet. Additionally, you can incorporate features like hiding spots, basking areas, and climbing structures, which mimic their natural habitat and stimulate their natural behaviors.
Overall, constructing a DIY Sulcata tortoise enclosure is a fulfilling and educational project that provides a suitable and enriching habitat for your reptile companion.
The Benefits of a Diy Sulcata Tortoise Enclosure
Creating a diy sulcata tortoise enclosure can be a rewarding project for reptile enthusiasts. Not only does it provide a suitable habitat for these unique creatures, but it also offers several benefits that make it worth the effort.
Another benefit of a diy enclosure is the opportunity to save money. Commercial enclosures can be expensive, especially when catering to the needs of large reptiles like sulcata tortoises. By building your own enclosure, you can save on costs while still providing a safe and suitable space for your pet.
Building a Diy Sulcata Tortoise Enclosure: Determining the Size and Location
First, you need to determine the size of the enclosure based on the size and number of tortoises you have. Sulcata tortoises are large creatures that require ample space to roam and graze. As a general rule of thumb, the enclosure should be at least 8 feet by 8 feet for one adult tortoise, and you should add an additional 4 square feet for each additional tortoise. This ensures that they have enough room to move around and exercise.
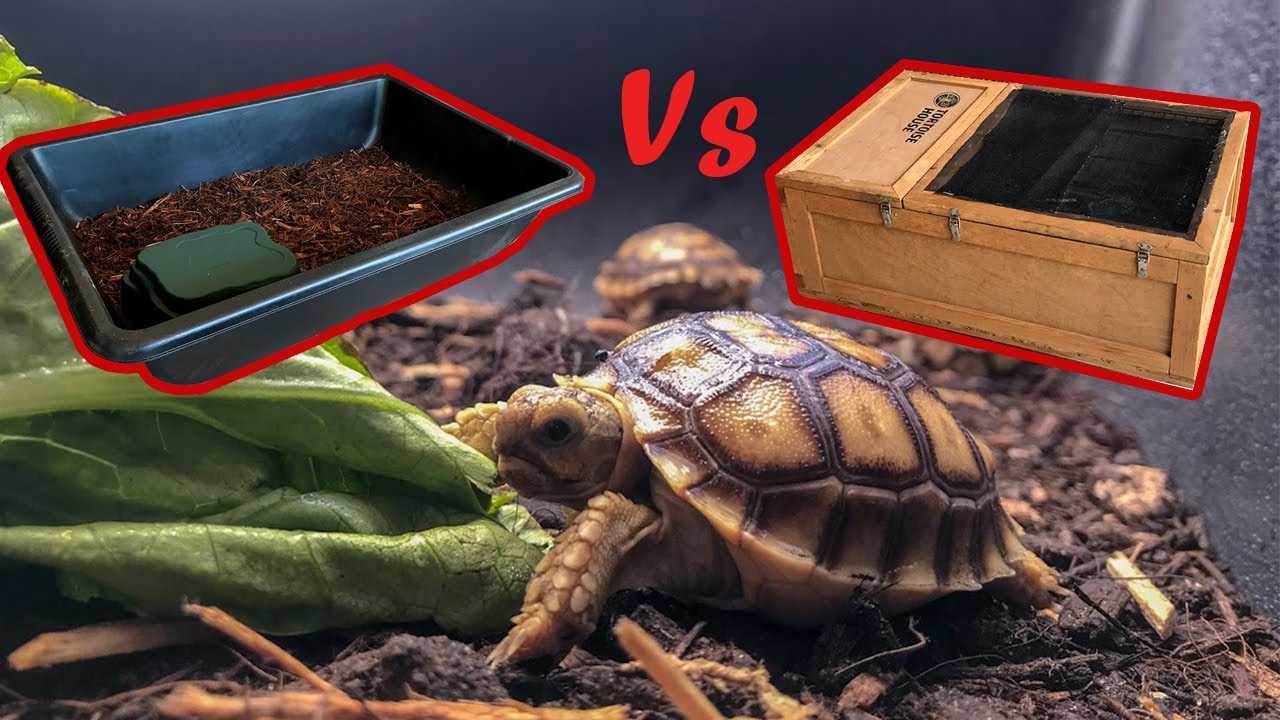
Next, consider the location of the enclosure. It should be placed in an area that receives plenty of natural sunlight. Sulcata tortoises need UVB light to properly metabolize calcium and vitamin D3, which are essential for their health. Ideally, the enclosure should be situated in a spot that gets sunlight for at least 6-8 hours a day.
Furthermore, it’s essential to consider the safety and security of the enclosure. Tortoises are prey animals, and they can be vulnerable to predators such as dogs, raccoons, and birds. Therefore, you need to ensure that the enclosure is securely fenced to prevent any unwanted guests from entering. A sturdy fence with small gaps or a buried wire mesh can be effective in keeping predators out and your tortoise safe.
By carefully determining the size and location of your diy sulcata tortoise enclosure, you are setting the foundation for a comfortable and suitable habitat for your reptilian friend. This will allow them to exhibit natural behaviors, explore their surroundings, and live a happy and healthy life.
Choosing the Right Size
Before determining the size of the enclosure, it is essential to consider the size and growth potential of your tortoise. Adult sulcata tortoises can grow to be quite large, with males reaching sizes of up to 30 inches and weighing over 100 pounds. Females typically grow to be slightly smaller, but still require ample space.
A general rule of thumb is to provide at least 10 square feet of enclosure space for every 1 inch of tortoise length. This means that if you have a tortoise that is 12 inches long, you should aim for a minimum enclosure size of 120 square feet. It is also recommended to provide additional space if possible, as tortoises thrive with more room to roam and explore.
Materials and Tools Needed for Diy Sulcata Tortoise Enclosure
When embarking on a Diy Sulcata Tortoise enclosure project, it is essential to gather all the necessary materials and tools beforehand. Here is a list of the key items you will need:
Materials:
- Wood planks
- Wire mesh or hard plastic panels
- Nails or screws
- Wood glue
- Hinges
- Door latch
- Paint or sealant
- Sand or substrate
- UVB lamp
- Heat lamp
- Water dish
- Hideouts and climbing structures
Tools:
- Tape measure
- Saw
- Drill or screwdriver
- Hammer
- Paintbrush or roller
- Wire cutters
These materials and tools are crucial for the successful construction of a Diy Sulcata Tortoise enclosure. Each item serves a specific purpose in creating a safe and suitable habitat for your reptile companion.
Gathering the Necessary Materials for Your DIY Sulcata Tortoise Enclosure
1. Enclosure Materials:
When gathering materials for your DIY tortoise enclosure, it’s essential to select materials that are safe, durable, and non-toxic for your reptile. Some common enclosure materials include:
- Wood: Choose untreated wood, such as plywood or pine boards, as it is safe for tortoises. Avoid using pressure-treated wood as it may contain chemicals that can harm your pet.
- Wire Mesh: Opt for a strong wire mesh that will provide adequate ventilation while keeping your tortoise secure. Make sure the mesh has small enough holes to prevent your tortoise from escaping.
- Screws and Nails: Use corrosion-resistant screws and nails to assemble the enclosure. This will ensure that the structure remains sturdy and safe for your tortoise.
- Paint or Sealant: If you choose to paint or seal your enclosure, make sure to use non-toxic, water-based products. Avoid oil-based paints or sealants that may contain harmful chemicals.
- Other Accessories: Depending on your design, you may also need additional materials such as hinges, latches, and door handles for easy access to the enclosure.
2. Tools:
To successfully build your DIY tortoise enclosure, you will need various tools. Some essential tools for this project include:
- Measuring Tape: Use a measuring tape to determine the dimensions of your enclosure. This will ensure that it is large enough to accommodate your sulcata tortoise comfortably.
- Saw: A saw will be necessary to cut the wood and mesh to the desired sizes. Choose a saw suitable for the thickness of the materials you are working with.
- Screwdriver: Use a screwdriver to attach the wood panels and mesh together. Make sure to have both a flathead and a Phillips head screwdriver on hand.
- Drill: A drill will be needed to create pilot holes for screws and nails, as well as for any additional hardware you may need to install.
- Sandpaper: Use sandpaper to smooth out any rough edges and surfaces on the wood, making it safe for your tortoise.
- Paintbrush: If you plan on painting or sealing your enclosure, a paintbrush will be necessary for the application.
By gathering all the necessary materials and tools beforehand, you can ensure a more efficient and hassle-free construction process for your DIY sulcata tortoise enclosure. Remember to prioritize the safety and well-being of your animal when selecting materials and building the habitat.
Step-by-Step Guide to Building the Diy Sulcata Tortoise Enclosure
Building a Diy Sulcata Tortoise enclosure can be a rewarding project for reptile enthusiasts. It not only provides a safe and comfortable habitat for your pet, but it also allows you to showcase your construction skills. Follow these steps to create a functional and secure enclosure:
- Planning: Before you begin construction, carefully plan the design and layout of the enclosure. Consider the size of your Sulcata Tortoise, the materials you will use, and the location of the enclosure.
- Gathering Materials: Collect all the necessary materials and tools for the project. This may include lumber, screws, wire mesh, hinges, and a door.
- Creating the Base: Start by building a solid base for the enclosure. Use sturdy materials such as pressure-treated lumber to ensure durability.
- Constructing the Walls: Next, create the walls of the enclosure. Use wire mesh to allow for ventilation and visibility.
- Building the Roof: Construct a secure roof for the tortoise enclosure. Make sure it is strong enough to prevent escape and provide protection from predators and the elements.
- Adding the Door: Install a door that is large enough for easy access to the enclosure. Make sure it is secure and can be locked to prevent any accidental escapes.
- Adding Accessories: Once the basic structure of the enclosure is complete, you can add additional features such as hiding spots, basking areas, and water dishes to create a stimulating environment for your tortoise.
- Testing and Evaluation: Before introducing your Sulcata Tortoise to the enclosure, thoroughly test its security and functionality. Make any necessary adjustments or improvements.
By following this step-by-step guide, you can create a Diy Sulcata Tortoise enclosure that meets the needs of your pet while showcasing your construction skills and creativity. Always prioritize the safety and well-being of your tortoise when designing and building the enclosure.

I’m Lena Adams—a product of an unconventional upbringing in the African wilderness. My father, a daring explorer of African wildlife, sparked my fascination with reptiles, a passion that intertwined with the tragic loss of my mother during an expedition, leaving an indelible mark on my life. Driven to understand the creatures that captivated my parents, I embarked on my journey, sharing insights about reptiles, frogs, and lizards on my website. Through my explorations and conservation efforts, I honour my family’s legacy while seeking connections—to the creatures, nature, and the mother whose presence I yearn to understand.