
Next, you need to have a bucket in your inventory. Buckets can be crafted using three iron ingots. Make sure you have one before attempting to put a frog in! Once you have a bucket, simply use it on the frog by right-clicking on it. The frog will then magically get captured inside the bucket.
So, there you have it! Now you know how to put a frog in a bucket in Minecraft. Enjoy exploring the game and don’t forget to take care of your froggy friend!
How to Select Your Materials in Minecraft
When playing Minecraft, there are certain materials you will need in order to put a frog in a bucket. Here is a step-by-step guide on how to select your materials:
Step 1: Understand what you need
Before you can put a frog in a bucket, you need to have the right materials. The main material you will need is a bucket. This can be crafted using three iron ingots. You can find iron ore deep underground, and smelt it in a furnace to get iron ingots.
Step 2: Gather the necessary resources
In order to gather the necessary resources, you will need to go mining. Grab your pickaxe and head underground to find iron ore. Mine the iron ore blocks and collect the iron ore.
Step 3: Smelt the iron ore
Once you have collected enough iron ore, head back to your base or furnace. Place the iron ore in the top slot of the furnace and fuel in the bottom slot. Wait for the iron ore to smelt, and you will receive iron ingots.
Step 4: Craft the bucket
Now that you have iron ingots, you can craft a bucket. Open your crafting table and place the three iron ingots in a “V” shape in the middle row. This will create a bucket.
Step 5: Verify your materials
Once you have crafted the bucket, make sure you have it in your inventory. You are now ready to move on to the next step, which is finding a frog.
By following these steps, you will be able to select the materials needed to put a frog in a bucket in Minecraft. Make sure to gather the necessary resources and craft the bucket before moving on to the next steps in the process.
How to Find a Frog in Minecraft
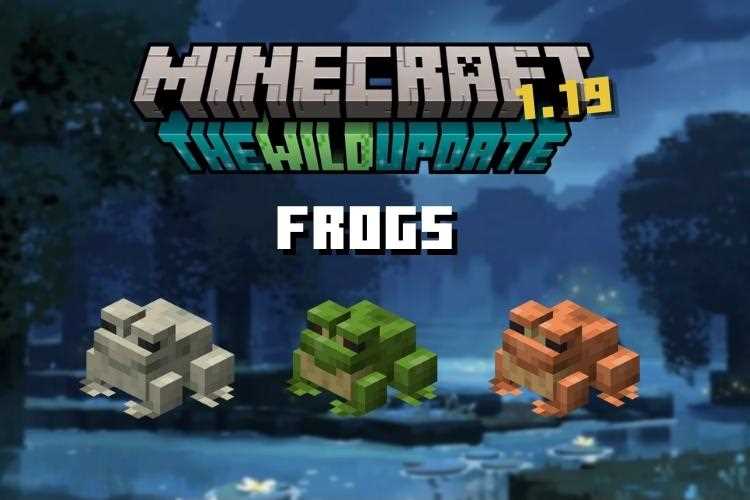
If you want to put a frog in a bucket in Minecraft, the first step is to find a frog. Fortunately, frogs can be found in a specific biome called the swampland biome.
Step 1: Prepare for the Journey
Before you start your search for a frog, make sure you have the necessary supplies. You will need a sword or another weapon to defend yourself against hostile mobs, as well as food to keep your hunger bar full during the journey. It’s also a good idea to bring a bed so you can sleep and set your spawn point if needed.
Step 2: Locate a Swampland Biome
To find a frog, you will need to locate a swampland biome in your Minecraft world. Swampland biomes can be found in most versions of Minecraft and are characterized by their swampy terrain, tall grass, and trees with vines hanging from them. They are typically found near rivers or in low-lying areas.
Step 3: Explore the Swampland Biome
Once you have found a swampland biome, it’s time to start exploring. Frogs can spawn naturally in swampland biomes, so keep an eye out for any hopping creatures. They are typically found near bodies of water, so be sure to check the edges of lakes, ponds, and rivers.
Step 4: Catch the Frog
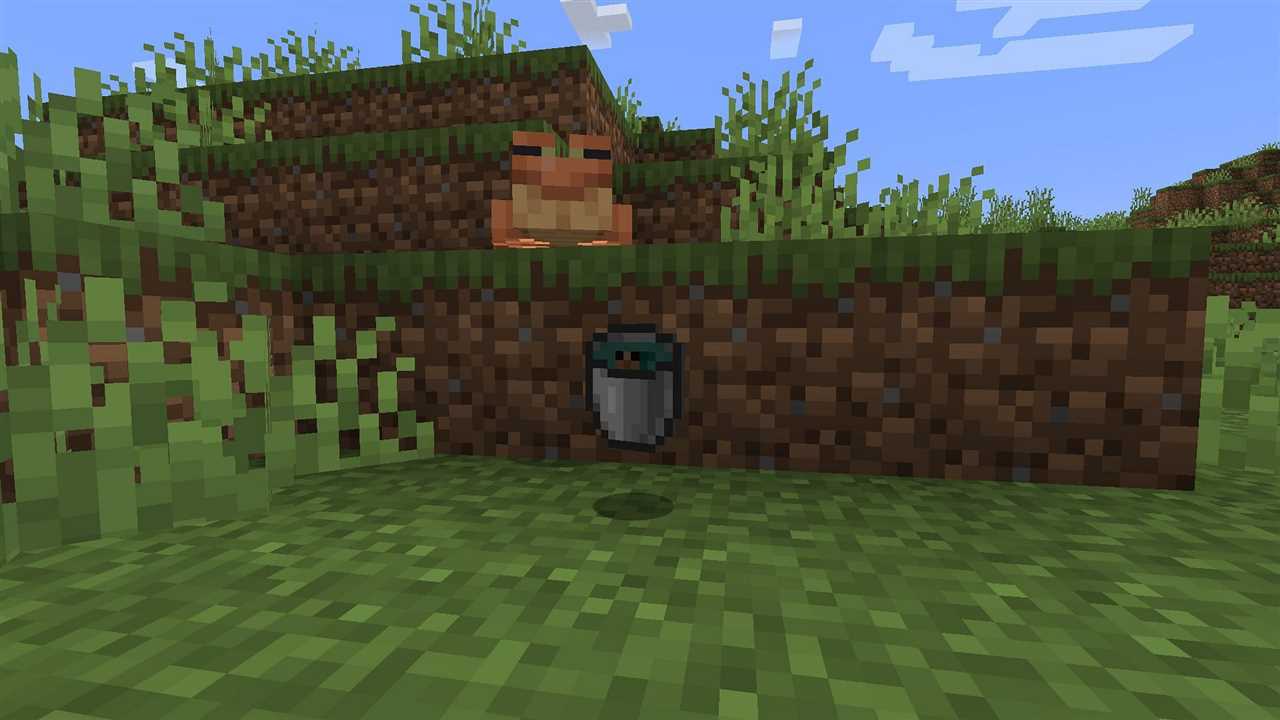
When you spot a frog, approach it slowly and carefully. Frogs in Minecraft are passive mobs, so they won’t attack you. To catch a frog, simply right-click on it with an empty bucket in your hand. The frog will then be captured inside the bucket.
Step 5: Store the Frog
Now that you have successfully caught a frog, you can store it in your inventory or place it in a chest for safekeeping. Make sure to handle the bucket with care to avoid accidentally releasing the frog.
With these steps, you can now find and capture a frog in Minecraft. Whether you want to keep it as a pet or use it for other purposes, having a frog in your Minecraft world can add some fun and variety to your gameplay.
How to Create a Bucket in Minecraft: Step-by-Step Guide
If you want to put a frog in a bucket in Minecraft, the first thing you need to do is create the bucket. Here is a step-by-step guide on how to do it:
- Gather the necessary materials: iron ingots.
- Open your crafting table.
- Place the iron ingots in the crafting table in the following pattern: one ingot in the bottom row, middle slot, and two ingots in the middle row, left and right slots.
- Drag the bucket from the crafting table into your inventory.
And there you have it! You have successfully created a bucket in Minecraft. Now you are ready to move on to the next step and put a frog in the bucket.
How to Prepare the Frog for Putting in a Bucket in Minecraft
Step 1: Choosing the right frog:
Step 2: Gathering the necessary tools:
Before attempting to capture the frog, make sure you have all the necessary tools and materials at hand. This includes an empty bucket, which will be used to safely transport the frog.
Step 3: Approaching the frog:
Once you have identified a suitable frog, approach it slowly and cautiously. Be mindful not to startle or scare the frog, as this may cause it to jump away or become agitated.
Step 4: Gaining the frog’s trust:
In order to safely capture the frog, you need to gain its trust. This can be achieved by offering it a small treat, such as a fly or a piece of raw meat. By feeding the frog, it will become more comfortable with your presence.
Step 5: Capturing the frog:
Once the frog is comfortable and distracted by the treat, carefully place your hands around its body, making sure to support its legs. Lift the frog gently and avoid squeezing or applying too much pressure.
Step 6: Placing the frog in the bucket:
After you have successfully captured the frog, it’s time to place it in the bucket. Slowly lower the frog into the bucket, making sure to do it in a way that minimizes any stress or discomfort for the frog. Be gentle and do not force the frog into the bucket.
Step 7: Securing the bucket:
Once the frog is safely inside the bucket, make sure to secure the lid tightly. This will prevent the frog from escaping and ensure its safety during transportation.
Step 8: Checking the frog’s well-being:
Before moving the bucket, take a moment to check on the frog and ensure it is not showing any signs of distress or discomfort. Make sure there is enough air circulation inside the bucket.
Step 9: Transporting the frog:
When ready to move the bucket with the frog, hold it securely and avoid any sudden or jerky movements that could disturb or harm the frog. Keep the bucket upright at all times.
Step 10: Storing the frog in the bucket:
If you need to store the frog in the bucket for a longer period of time, make sure to provide it with a comfortable environment. Place some moss or damp paper towels at the bottom of the bucket to provide moisture.
Step 11: Releasing the frog:
When the time comes to release the frog, choose a suitable location that resembles its natural habitat. Gently open the bucket and allow the frog to hop out at its own pace.
Step 12: Enjoying the experience:
Finally, take a moment to appreciate the unique experience of capturing, transporting, and releasing a frog in Minecraft. Enjoy the presence of the frog in your virtual world and cherish the memories created throughout this process.
How to Approach and Engage a Frog in Minecraft
Step 6: Approach the Frog
Approaching the frog requires careful movement and precision. Follow these steps to successfully approach the frog:
- Make sure you have the bucket in your inventory or selected in your hotbar. You will need it to capture the frog.
- Position yourself close to the frog without startling it. Frogs in Minecraft have a tendency to hop away when they sense danger.
- Slowly move towards the frog, taking small steps to avoid scaring it off.
- Keep an eye on the frog’s behavior. If it starts to show signs of unease or begins to move away, stop and assess your approach. Adjust your movements accordingly.
- Be patient. Approach the frog with caution and give it time to get used to your presence.
- Avoid sudden movements or loud noises that may startle the frog. Remember, you want to capture it without causing any harm or distress.
Approaching a frog in Minecraft requires a gentle touch and careful observation. By following these steps, you can successfully approach and engage the frog, setting the stage for the next steps in putting it in a bucket.
Engage the Frog in Minecraft: A Step-by-Step Guide
Engaging the frog is an important step in putting it in a bucket in Minecraft. Follow these instructions carefully to successfully capture the frog:
Step 7: Engage the Frog
Now that you have located the frog, it’s time to engage with it. Approach the frog slowly and cautiously, as frogs can be easily startled. Make sure you have the bucket ready and equipped in your hand.
Tip: It’s helpful to have some patience during this step, as capturing the frog may require multiple attempts. Don’t give up!
Once you are close to the frog, you can start the engagement process. Right-click or left-click, depending on your game controls, to interact with the frog. This will initiate the capture process.
Important: It’s crucial to time your engagement correctly. Clicking too early or too late may result in the frog jumping away, and you will have to start the process all over again.
During this step, you might need to repeat the engagement process a few times before successfully capturing the frog in the bucket.
Remember, engaging the frog requires precision and timing. Practice your clicking technique until you feel confident in your ability to capture the frog.
Once you successfully engage the frog, you are ready to proceed to the next step in putting the frog in the bucket in Minecraft. Congratulations on getting one step closer to having your very own frog companion!
How to Cover the Frog with the Bucket in Minecraft
Once you have successfully engaged the frog, the next step is to cover it with the bucket. This will ensure that the frog remains secure and prevents it from escaping.
Follow these steps to cover the frog with the bucket:
Step 1: Position the Bucket
Hold the bucket in your hand by selecting it in your Minecraft inventory. Make sure you are standing close to the frog and have a clear line of sight.
Step 2: Aim at the Frog
Position your cursor directly over the frog. This will ensure that when you use the bucket, it covers the frog accurately.
Step 3: Right Click to Cover
Once you have the frog in your sights, right-click or tap the screen (depending on your device) to cover the frog with the bucket. The bucket will instantly appear over the frog, encasing it.
If done correctly, you will now have a bucket with a frog in it. You can move on to the next steps to secure the bucket and check if the frog is properly contained.
Once you have successfully covered the frog with the bucket, the next step is to secure the bucket to ensure that the frog does not escape while you are moving it.
Materials:
- A bucket with a frog inside
- String or rope
To secure the bucket, you will need to tie a strong knot around the handle or the top of the bucket. This will prevent the frog from pushing the lid off and escaping.
Here’s how you can secure the bucket with the frog:
| Step | Instructions |
|---|---|
| 1 | Take the string or rope and make sure it is long enough to go around the handle or the top of the bucket. |
| 2 | Wrap the string or rope tightly around the handle or the top of the bucket. |
| 3 | Tie a secure knot to hold the string or rope in place. |
| 4 | Double-check the knot to ensure that it is tight and will not come undone. |
By securing the bucket with the frog, you can now safely move it without worrying about the frog escaping. Remember to handle the bucket with care to avoid any unnecessary stress or harm to the frog.
Continue following the remaining steps to learn how to check the bucket, move it with the frog, store it, release the frog, and finally enjoy having a frog in Minecraft!
How to Check the Bucket with the Frog in Minecraft
Checking the bucket with the frog is an important step to ensure that the frog is secure and ready to be moved or stored. Here’s a guide on how to properly check the bucket:
Step 1: Approach the Bucket
Carefully approach the bucket with the frog, making sure not to startle or disturb the frog inside.
Step 2: Examine the Bucket
Take a close look at the bucket to see if it is intact and properly sealed. Ensure that there are no cracks or holes that could potentially allow the frog to escape.
Step 3: Listen for Sounds
Hold the bucket close to your ear and listen for any sounds coming from inside. If you hear any movement or croaking, this indicates that the frog is active and the bucket is secure.
Step 4: Check the Lid
Evaluate whether the lid of the bucket is tightly sealed. Gently press down on the lid to ensure it is securely in place. If the lid feels loose, carefully tighten it to prevent the frog from escaping.
Step 5: Look for Signs of Stress
Observe the behavior of the frog inside the bucket. Check for signs of stress, such as excessive jumping or trying to escape. If the frog appears agitated, it may be necessary to reposition or secure the lid more firmly.
Step 6: Verify the Frog’s Size
Take a moment to assess the size of the frog in relation to the size of the bucket. Ensure that the frog has enough space to move comfortably without feeling trapped or cramped.
By following these steps, you can confidently check the bucket with the frog in Minecraft, ensuring the safety and well-being of the frog in its temporary habitat.
How to Move the Bucket with the Frog: Step-by-Step Guide
Once you have successfully captured a frog in a bucket in Minecraft, you may want to move it to a different location. Follow these steps to ensure a safe transfer:
Step 1: Find a Suitable Location
Before moving the bucket with the frog, make sure you have a destination in mind. Find a suitable location where you want to release the frog.
Step 2: Approach the New Location
Move towards the desired location, keeping the bucket with the frog securely in your hand. Be cautious not to drop or tilt the bucket during the transfer.
Step 3: Choose the Release Spot
Select a specific spot within the new location where you want to release the frog. It should be an area with vegetation or water nearby, as frogs prefer these habitats.
Step 4: Carefully Empty the Bucket
Gently tilt the bucket, allowing the frog to climb out. Be patient and give the frog time to adjust to its new surroundings. Remember, the frog may hop away quickly, so be prepared.
Step 5: Observe the Frog
Once the frog has been released, take a moment to watch its behavior. It may explore its new environment or seek out a hiding spot. Enjoy the satisfaction of successfully moving the frog to a new location.
Step 6: Properly Dispose of the Bucket
After the frog has been safely released, be sure to properly dispose of the empty bucket. You can either store it in your inventory or discard it, ensuring it doesn’t clutter the area.
By following these steps, you can confidently move the bucket with the frog to your desired location in Minecraft. Enjoy exploring new areas with your newfound frog companion!
How to Store the Bucket with the Frog in Minecraft
Step 1: Find a Safe Location
Before storing the bucket with the frog, you need to find a safe and suitable location. It should be an area where the frog can remain undisturbed and away from any potential threats, such as hostile mobs.
Step 2: Choose an Enclosed Space
Select an enclosed space, such as a cupboard or a chest, to store the bucket with the frog. This will prevent the frog from accidentally escaping or being harmed by external factors.
Step 3: Place the Bucket with the Frog
Carefully place the bucket with the frog inside the chosen enclosed space. Make sure to position it in a way that the bucket is stable and won’t tip over easily.
Step 4: Monitor the Frog’s Condition
Regularly check on the frog to ensure it is safe and healthy. Minecraft frogs require a suitable environment to thrive, so monitoring their condition is crucial for their well-being.
Step 5: Provide Adequate Food and Water
Step 6: Release the Frog when Desired
If you no longer wish to keep the frog in the bucket or if you want to let it explore the Minecraft world, you can release it by simply right-clicking on the bucket while holding it in your hand.
Remember: Always be mindful of the frog’s well-being and ensure that it is released in a safe and suitable location where it can thrive.
By following these steps, you can successfully store the bucket with the frog in Minecraft and ensure the safety and happiness of your virtual pet.
How to Release the Frog from the Bucket in Minecraft
After successfully capturing a frog in a bucket in Minecraft, you may be wondering how to release it and let it roam free. Fortunately, releasing a frog from a bucket is a relatively simple process.
Step 1: Find a Suitable Location
Step 2: Approach the Water
Carefully approach the water’s edge while holding the bucket with the frog. Make sure there are no obstacles or hazards between you and the water to ensure a smooth release.
Note: While holding the bucket, be cautious not to accidentally drop it or let go of the frog prematurely. The goal is to release the frog gently and without causing harm.
Step 3: Release the Frog
Remember: Releasing the frog into the water should be done in a gentle and controlled manner. Avoid throwing or forcefully releasing the frog, as this could potentially harm the creature.
Step 4: Observe and Enjoy
After successfully releasing the frog, take a moment to observe it in its natural environment. Watch as it swims or hops away, blending in with the surrounding nature.
Tip: If you want to keep track of the frog after releasing it, you can mark the location or build a small observation area nearby to periodically check on its well-being.
Congratulations! You have successfully released a frog from a bucket in Minecraft. Now you can enjoy the satisfaction of witnessing the creature return to its natural habitat.
Release the Frog from the Bucket
After enjoying your frog’s company in the bucket, it’s time to release it back into the Minecraft world. Follow these steps to safely and gracefully let the frog go:
- Ensure that you are in a suitable location where the frog can thrive.
- Find an open area with enough space for the frog to hop around without obstacles.
- Carefully lift the bucket containing the frog and hold it securely.
- Gently tilt the bucket to its side, creating a small opening.
- Allow the frog to hop out of the bucket at its own pace. Do not force or scare the frog.
- Observe the frog as it explores its newfound freedom.
- Appreciate the beauty and uniqueness of the frog in its natural habitat.
- Take a moment to reflect on the experience and the joy it brought to your Minecraft adventure.
- If desired, you can continue to interact with the frog by observing it from a distance.
Remember, releasing the frog back into its environment is important for its survival and the balance of the Minecraft ecosystem. It’s a small act that can make a big difference in preserving the natural world of Minecraft.

I’m Lena Adams—a product of an unconventional upbringing in the African wilderness. My father, a daring explorer of African wildlife, sparked my fascination with reptiles, a passion that intertwined with the tragic loss of my mother during an expedition, leaving an indelible mark on my life. Driven to understand the creatures that captivated my parents, I embarked on my journey, sharing insights about reptiles, frogs, and lizards on my website. Through my explorations and conservation efforts, I honour my family’s legacy while seeking connections—to the creatures, nature, and the mother whose presence I yearn to understand.